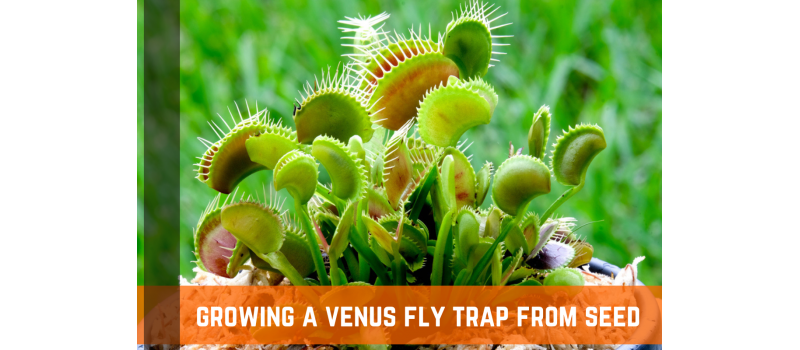
Raising Venus flytraps from seeds is an essential activity for anyone who is passionate about these plants. It is not difficult to germinate and produce Venus Flytrap plants from seeds, provided that a few parameters are satisfied for ideal germination. In the following paragraphs, we will go over these requirements and procedures in greater detail.
In the northern hemisphere, the flowering and seed-producing season of the Venus Flytrap typically takes place between the months of April and June. Therefore, by the end of June or the beginning of July, fresh new seed ought to be accessible. After harvest, seeds have a good chance of germinating successfully for at least a year if they are properly stored in a refrigerator. Even after being stored for a number of years, numerous people have reported high germination rates.
How Long Does It Take for the Seed of a Venus Flytrap to Become Germinated?
Venus flytraps, in contrast to pitcher plants and other types of carnivorous plants, do not need to have their seeds stratified in order to thrive. The only things you need to get a Venus flytrap seed off the ground are the appropriate kind of soil and the proper amount of time.
The seed of a flytrap takes anywhere from one to five weeks to germinate after being planted. This will differ depending on the temperature of the atmosphere in which your Venus flytrap is kept.
How to Grow Your Own Venus Flytrap
If you purchased your Venus fly trap seeds, the likelihood is that they were contained within a bag of no more than 30 seeds. I possessed two distinct packs, one of which contained 10, and the other of which contained 15.
Need to protect your goods and materials during storage or shipment? Shop our selection of high-quality pallet covers!
In a situation where there are only a few seeds, such as this one, it is best to plant each seed separately and disperse it across the earth. This may seem like a lot of work, but it will prevent the seeds from clustering together in one area, which will improve the chances of germination for each individual seed.
Need to protect your farming or recreational vehicles? Check out our selection of heat shrink wrap!
You can either remove them by hand or make use of some tweezers with a flat end; however, take care not to crush them! Spread the seeds on the surface of the soil. Don't put them in the ground! If you so desire, you can finish off the top with a sprinkling of peat moss.
This will aid in the preservation of moisture and provide the young plant with something against which to push, which in turn will assist in driving the roots firmly into the soil. If you choose to proceed in this manner, use a spray bottle to apply distilled water over through the surface of the soil in order to completely saturate it.
Protect your plants from harsh sunlight! Check out our selection of shade cloth!
Your seeds have been planted! You must now ensure that they remain moist and warm throughout all times until the seeds germinate. There are many different approaches to take here. The ideal temperature range for your seeds somewhere between 78 and 90 degrees Fahrenheit (25 – 32 C).
They will germinate more quickly if the temperature is raised above that of the average room. Always keep a close check on the top layer of the soil, and work to prevent it from drying out. In order to raise the level of humidity on the top, you can either mist it with distilled water or cover it with a sheet of transparent plastic. If you do not remove the plastic on a regular basis, mold will begin to grow on the soil, which is an indication that enough air circulation is still essential.
Mitigate erosion with our straw-net blankets. Shop our selection of erosion control blankets!
If at any point the seeds are exposed to direct sunlight, you should not cover them with plastic. They are at risk of quickly overheating and passing away. For that matter, seeds do not require any direct exposure to sunlight at all. The appropriate amount of sunshine is bright but indirect.
Keeping the seeds close to a windowsill that gets plenty of light is effective for many people. You can also store them in an area that is illuminated by a daylight-balanced light bulb that is controlled by a timer (12-16 hours of light is sufficient).
Take Proper Care of Your Young Venus Flytrap Plant
Congratulations are in order after you notice that the soil is beginning to show symptoms of sprouting Venus flytrap seedlings. The challenging part is over with! Now remove the top of the bag to give the Venus flytraps access to air as they continue to develop.
Avoid putting the sprouts in a cool location and instead make an effort to get them into the light as soon as possible. However, you shouldn't put the seedling in a particularly hot spot because prolonged exposure to the sun's rays can cause the seeds to boil and ultimately die. Put them in a place where there is a lot of light but not a bunch of direct heat.
Which of These Carnivorous Plants Is the Easiest to Cultivate?
There are many different kinds of carnivorous plants, and each one presents its own unique challenges. It is not difficult to cultivate Venus flytraps once you have learned the proper techniques, though it does need some time, commitment, and care. This entails obtaining Venus flytrap soil and being familiar with the process of planting a Venus flytrap.
Shop Our Selection Of Farm, Garden, & Agricultural Products!
4 Year Clear UV Resistant Greenhouse Plastic
4 Year UV Resistant White Greenhouse Plastic