If you’re looking to build something decently inexpensive that’s a great place to grow food in a smaller, vertical area, look no further than a DIY hoop house greenhouse.
A hoop house greenhouse will last for years and can be used as a trellis for tomatoes, melons, and cucumbers - and that’s just the beginning of the list. Because it offers protection from the sun, it allows you to grow cooler crops in the tunnel, and because it protects from frost, it allows you to extend your growing season.
If you don’t have much space to grow, sometimes the best option is growing vertical - and a hoop house greenhouse can help you create the best vertical garden possible.
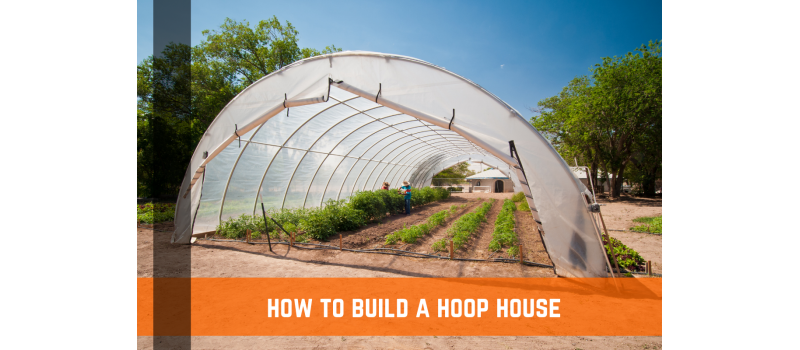
What is a Hoop House?
Basically, a hoop house is a DIY greenhouse that sits in your garden. You can build it by using cattle fencing or PVC hoops wrapped in plastic covering. You can either build your hoop house in a raised bed, or as a row cover in your current garden bed.
By adding plastic sheeting, it allows you to extend your growing season and plant before temperatures warm up and after they cool down.
What You’ll Need
Here are the materials that you’ll need to build your very own hoop house greenhouse:
Wooden boards (using what you have on-hand works fine)
Corner Brackets
PVC Pipes - 1” PVC pipe, up to 20 feet for hoops (to use 1 hoop every 4 feet)
Hoop House Dimensions
After you’ve got all of your materials in order, it’s time to decide the dimensions of your hoop house. The size depends on your needs - but keep in mind how you want to use your hoop house when deciding its dimensions.
Do you need room to walk through the tunnel for the purposes of weeding, planting, and harvesting? Do you want to leave some room for your garden to grow?
These are answers that you should know before choosing the dimensions for your hoop house.
Is Rebar Required?
Rebar is technically not required, as you could also use flat metal forming stakes, wood stakes, or something else of your choosing. But out of all of these options, rebar is the cheapest option - and we like to keep things affordable at Farm Plastic Supply.
The Building Process - Step by Step
Let’s get started. Here’s what the process of building your own hoop house greenhouse looks like:
Measure and mark the four corners.
This is to guide your frame build. Keep in mind the dimensions that you chose in the very first section.
Build a corner.
You can do this by using a corner bracket. This corner will help to demarcate the boundaries of your greenhouse, giving you a good idea on where to start when placing the rows.
Find out the width of your row.
Determine the width of each of your rows, marking each edge as you go along. Make sure you’re working with straight beds, as this will make the project go more smoothly.
Mount the combo bracket to the first board, then screw it in.
This combo bracket is where you will eventually insert the PVC pipe, so make sure it’s placed firmly and securely.
Mount the next board and the next bracket.
Do this every four feet. This is a good size for hoop house greenhouses, as it allows for breathing room but is still a contained, reasonable size.
Mount the channel using the self-tapping screws after the enclosure is complete.
Do this around the entire frame.
Level out the soil and add mulch.
Level out the soil and shape up the beds - what works is raking out the soil and then adding mulch so it’s protected. Doing this before adding the paneling is the easiest way to go.
Now that your frame is built, now it’s time to flex the PVC pipes into the hoop shape.
Place the PVC into one end of the combo bracket, then flex it to the opposite end. This will create the ‘hoop’ look of the greenhouse, AKA the curved roof.
Use the hoop and Purlin cross connectors in order to mount the horizontal member.
This is critical, as it provides the hoops with some stability. It can come in handy during inclement weather or times of heavy snowfall.
To increase the longevity of the greenhouse film, it’s recommended to use felt or duct tape on the PVC portion that contacts the film. This isn’t necessary, but it helps to make the plastic last longer.
As with anything else, this choice is up to the greenhouse creator - you!
You might need a second pair of hands for this part - get some help and pull the greenhouse film over the hoops.
Don’t do this on a windy day! Placing the greenhouse film with the weather is mild allows for accurate placement and firm holds. Two people doing this job makes for a more secure hold - you might find it pretty impossible to do on your own.
We also recommend pulling carefully, as pulling with too much force can harm the greenhouse film. It’s tough, but still needs to be handled with a gentle touch.
After the film is over the top, secure one end using the wiggle wire into the channel. Then go to the opposite side, pull taut, and insert wiggle wire.
This creates the firm roof of the hoop house greenhouse, keeping the warm air inside and the cool air on the outside. The wiggle wire will prevent any loosening or chance for the greenhouse plastic to come out of its channel.
Use the snap clamps to connect the greenhouse film end caps.
This keeps the film firm on the front and the back side, which aids the integrity of the cold frame as a whole.
Secure the bottom with wiggle wire.
Wiggle wire is like the glue that holds everything together. As long as it is in place, your greenhouse film has a very low chance of becoming loosened or compromised.
Then, you may want to create a slit with a zipper or make a custom door.
Of course, this is how you’ll enter and exit the greenhouse - just make sure that the door is made with care, as this could be a place where the temperature inside the greenhouse could become compromised if it’s made sloppily.
Your DIY Hoop House Greenhouse
All in all, the process of building your own hoop house greenhouse is pretty straightforward. It’s helpful when you’re interested in getting your growing season started earlier and allowing it to last longer.
Shop Our Selection Of Farm, Garden, & Agricultural Products!
4 Year Clear UV Resistant Greenhouse Plastic
4 Year UV Resistant White Greenhouse Plastic
Panda Film/Light Deprivation Covers


")

-120x120.jpg "Hoop and Purlin cross connectors 1-3/8\" x 1-3/8'' (10 Count)")
